Geneva Wafers, Department of Yummy
The other day I happened across The Rambling Jour’s blog post (thanks, Rachel, for digging that up!!!) about making Geneva Wafers. someone’s blog post (which now I can’t find or I’d give a link back) where she’d tried making a recipe from the 1860s called “Geneva Wafers.” She didn’t give a link or provide the recipe (but did provide the book title) so I Googled and ended up with the 1861 Mrs. Beeton’s recipe for Geneva Wafers. A bit more Googling revealed that whatever Mrs. Beeton’s source, she has since been widely copied without credit. The White House Cookbook of 1887 has this recipe VERBATIM, and I found it a couple of other places, also mostly verbatim and uncredited. So, yeah.
Anyway, the intrepid Ms. Curley of the Rambling Jour blog had some pictures of her test (which apparently was delicious but a failure). However, when I saw her pictures I had a pretty good idea of what had gone wrong for her. When I found the recipe, it did look simple, and it was.
This recipe is a major win.
I ended up making two separate batches, in part because the first batch vanished like magic. I kid you not, people took one, looking doubtful, because, come on, they look sissy, and as soon as they ate it, they reached for more. Several more.
I made the second batch to test a couple things but also because the first batch was gone.
The Original Recipe
GENEVA WAFERS
Ingredients
2 eggs
3 oz of butter
3 oz of flour
3 oz of pounded sugar
Well whisk the eggs put them into a basin and stir to them the butter which should be beaten to a cream add the flour and sifted sugar gradually and then mix all well together.
Butter a baking sheet and drop on it a teaspoonful of the mixture at a time leaving a space between each Bake in a cool oven watch the pieces of paste and when half done roll them up like wafers and put in a small wedge of bread or piece of wood to keep them in shape Return them to the oven until crisp Before serving remove the bread put a spoonful of preserve in the widest end and fill up with whipped cream This is a very pretty and ornamental dish for the supper table and is very nice and very easily made Time Altogether 20 to 25 minutes Average cost exclusive of the preserve and cream Ld Sufficient for a nice sized dish Seasonable at any time.
The Recipe – Translated and Very Slightly Adapted
GENEVA WAFERS
Ingredients
2 eggs
3 oz of unsalted butter (6 tbs)
3 oz cake flour (This is roughly 3/4 cup, sift then measure or weigh (* )
3 oz bakers sugar (1/2 cup) (Regular sugar would be just fine)
1 tsp vanilla
1 pint whipped cream
Preserves (or jelly or jam)
* If you weigh your flour, you do NOT need to make the standard regular flour-to-cake-flour adjustment, but make sure you weigh it AFTER you sift it. (a)
NOTE: This recipe seems like a small amount, and I was tempted to double it. This made 2 dozen wafers NOT COUNTING all the ones I ate before the 2nd baking step. The second batch produced about 18 wafers. Which I suppose means that I ate the equivalent of 6 from the first batch. Maybe. My “disaster save” (b) meant there was unusable (but not inedible) leftover. I HAD to eat it.
Have everything at room temperature.
Pre-heat the oven to 325 F
In a separate bowl, whisk the eggs thoroughly.
Cream the butter. Gradually beat in the sugar until fluffy. Lack of fluffiness is a serious baking problem! (Only slightly kidding.) Beat in the flour, scraping down sides as needed. Beat until fluffy (At least another minute and 30 seconds after all the flour is combined.) (c)
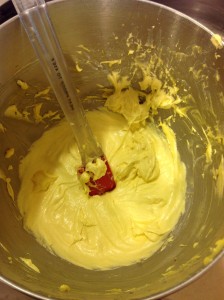
As you can see, the batter is not runny and there’s no tiny butter bits. Also, as a note, we have chickens which means fresh eggs from free-range chickens. The yolks are intensely yellow. If you use store-bought eggs, your batter will probably be less yellow.
I think cooking these on parchment paper might be best, but we were out of parchment paper and thus I could not test that theory. However, if you butter your baking sheet, use a light hand or you will have a mess. (There is a rescue for this if it happens, see below.)
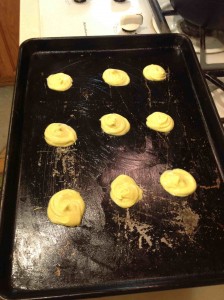
Drop the batter onto the cookie sheet a teaspoonful at a time leaving ample space between each:
Bake for 4-5 minutes. Wafers should be slightly spongy and not in the least brown at the edges. If they have started to turn brown, they will be very difficult to fold. 4 minutes people. (d)
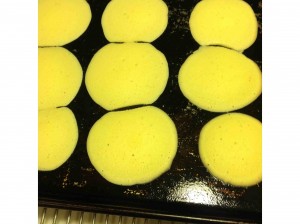
Take them out (DO NOT TURN OFF THE OVEN! YOU ARE NOT DONE!) and roll them up in a cone shape. You can see from the previous two pictures how much the batter spreads while baking.
Folding them into a cone shape is easier when the wafers are larger, still warm, and only half-baked. (Heh!)
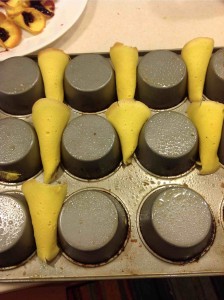
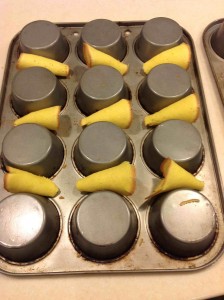
As you can see, I set mine between the cups of an inverted muffin tin.
Return them to the oven and bake another 4-5 minutes until crisp (edges will be turning golden brown)
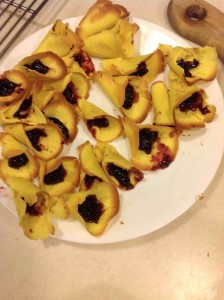
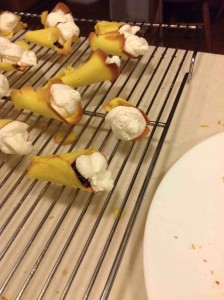
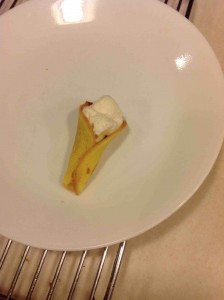
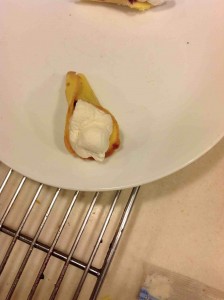
Before serving, drop a spoonful of preserve in the widest end and fill up with whipped cream. The whipped cream will hid a lot of sins. (I do find this to be generally true about whipped cream.)
Some tips
- At first I thought these needed salt when I tasted just the wafer. However, once the preserves and whipped cream were in, I decided no salt is needed. They were perfect. Light, delicate, and not at all too sweet.
- A teaspoon of vanilla would be a good addition, and yes, I did add it to my 2nd batch.
- If you have a pastry bag, you could pipe out a perfectly round wafer, but of course a plastic bag with a hole cut in one corner would work, too. Except it’s probably not worth it, because I still had to use a (clean) finger to achieve a rounder shape, but it was a little easier. No doubt some expert piper would do this effortlessly and perfectly.
- Leave A LOT of space between the wafers. Probably no more than 6-9 on a standard cookie sheet. You can see from the pictures that they spread a lot while baking the first time.
- The cone shape is easier to achieve if the wafer is 2.5 to 3″ in diameter.
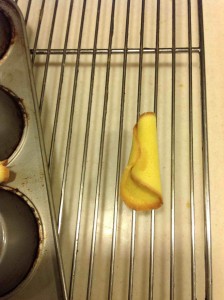
- I suspect in the 2nd baking, these could be cooked on a wire rack, but the bread-as-holder idea has merit. I may try that.
- You only need a dab of preserves (or jelly or jam), I’d say 1/4 to 1/2 teaspoon. Pipe in the whipped cream (pastry bag, or a plastic bag with the corner cut)
Yum. Really easy and surprisingly quick to make.
Some other analysis
From the pictures I saw at the blog that made me want to try this, unless the blogger was unintentionally vague about her process and the pictures, I believe she forgot to put in the flour. She also followed the recipe pretty closely and added the eggs to the creamed butter, which would mean you’d have to be REALLY strict about beating after the other ingredients in order to get the butter to evenly disperse. She may not have weighed her ingredients and might have ended up with far too little flour since her pictures showed a watery batter with tiny bits of butter.
We have a food scale which I used to tare my ingredients to make sure I had the right proportions. As you can see from the pictures, my batter came out smooth and slightly thicker than cake batter. Mmm.
Additional Notes
a. If you substitute cake flour for regular flour in a recipe, it’s 1 cup plus 2 TBS of cake flour for every cup of regular flour.
b. The disaster save: For my first batch in the oven, I over-buttered the sheet. This resulted in wafers that spread too much and were essentially a partially connected blob. I used a round cookie cutter to cut out my wafer shape. Now you understand why I had to eat the overage.
c. The first time, I followed the instructions exactly and added the eggs to the creamed butter, then added the sugar and flour. The second time, I used the “traditional” cream butter, add sugar, then add the eggs, then the flour. Either way, you need to make sure you beat enough for the butter to be thoroughly incorporated.
d. For the 1st batch, I placed the folded wafers in muffin tins. This worked, but not as well as turning the muffin tin upside down and resting them between the cups. (See photo) I think baking them on a wire rack would work better. If you do this, let the wafers cool for 5 minutes or so before removing them from the tin. A knife gently slipped between the muffin tin and the wafer should pop them free if they’ve stuck a bit.

Making my morning coffee and wishing I had some of these!
It’s fun trying to recreate period recipes (admit I have eaten some semi-mistakes, too).
This made me very hungry. Also it reminded me of the time that I made madeleines.
I cannot tell you how delicious these are. And seriously, remarkably easy to make. I’m going to make these again.
I think I’ve just found the ideal refreshments for my next critique meeting. Thank you for sharing and for experimenting! I love to bake, but it usually works out best for me when someone else has worked out the kinks in a recipe.
I cannot wait to try these! They sound scrumptious! And I am going to pass all of this on to my Mom. She loves to bake little things like this for church meetings and baby showers. Well done, Carolyn!
These look delicious!!
Alas, I make a better scullery maid than I do a cook so I might just have to beg for an invitation to tea sometime when you are serving them. (I’ll just pop across the country for it. Won’t take long…)
These look amazing. I shall be making them.
Would this be the blog post you mentioned?
http://heatherhambelcurley.wordpress.com/2013/01/04/the-first-baking-fail-of-2013-the-things-i-do-for-my-novel/
They look absolutely DELICIOUS – I love to bake so the next chance I get I may just have to give these a whirl! I am always quite strict with making sure everything is mixed in evenly so hopefully they wont flop!!
Rachel: !! Yes, that’s the blog. Thank you for finding that. My Google fu totally failed me. I’ve updated my post to add the link to her post.
FayL I think I could sit there and eat a dozen no problem. As long as you observe the temperature and don’t overcook the first baking, these are a snap. And I say that even though it sounds complicated.
[…] Ruin came out. Risky readers of this book might well recognize some of the elements in the book: Geneva Wafers: In this post, I blogged about making Geneva Wafers from a period cook book, one of the most […]